
This guide covers what you need before installing GASWorkS 11, how to install and license it, how to start and exit the software, how to set your preferred decimal precision and dimensional units, and where to find help. An internet connection is required the first time you run GASWorkS — the license, help documentation, and GeoMap functions all depend on it, even though the software itself can run offline for up to 30 days once a license is checked out.
System & Hardware Requirements
Before installing, confirm your device meets these requirements.
- Windows 8 through Windows 11. A device with more memory and a faster processor gives the best performance.
- A mouse or similar pointing device is recommended; a touchpad is discouraged.
- At least 18 MB of free hard disk space.
- An internet connection, needed for the license management system, help documentation, and the GeoMap functions.
- Microsoft .NET Framework 4.8 or newer. Not every version of Windows supports the required Framework version, so confirm compatibility first.
Installing GASWorkS
Installs the GASWorkS 11 software on your device.
- Using the provided link, download the setup (.exe) file to your device, then locate it in Windows File Explorer.
- Double-click the setup file. If a Windows Security warning appears, allow the device to run it. You’ll need to be logged on as the Full Administrator, or use the “Run as administrator” option.
- Work through each installation screen as it appears, reading and responding to each one. On the Terms Of Use screen, read the agreement and select “I agree to…” — installation can’t continue otherwise.
- When a message reports the installation finished (successfully or not), select the appropriate option to clear it.
Starting GASWorkS & Your License
Starts GASWorkS and checks out a license so you can begin working.
- From the Windows Desktop, double-click the GASWorkS 11 shortcut icon. The first time you run it, your device must be connected to the internet, and you’ll need to be logged on as the Full Administrator or use “Run as administrator.”
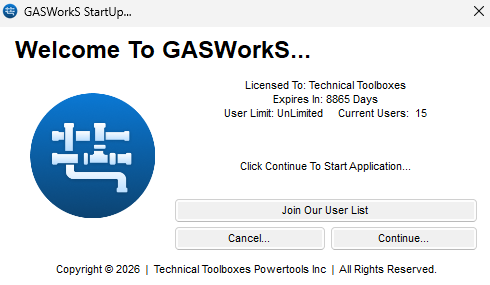
- The Welcome screen displays, showing your license information — including the User Limit and Current Users. Review it, then click Continue to check out a license and enter the software.
- If a software update is available for GASWorkS or its support files, a message offers to install it — accepting is recommended.
Notes
- GASWorkS uses an internet-based license system: license information lives on a B3PE server, and availability is checked against your subscription’s User Limit each time someone tries to use the software. A license can be checked out for up to 30 days, during which no internet connection is required on that device.
- If the device isn’t connected to the internet on first launch, a message reports the software is “Unable To Access Validation File.” Connect to the internet and click Retry to proceed.
- If adding a new user would exceed the subscription’s User Limit, Continue stays disabled until one of the in-use licenses is returned.
- Once you’re comfortable with installation and startup, working through the Demonstration Guide is a good next step for getting familiar with the software’s features.
Setting Decimals & Dimensional Units
Sets how many decimal places are displayed for each data item, and which dimensional units GASWorkS uses.
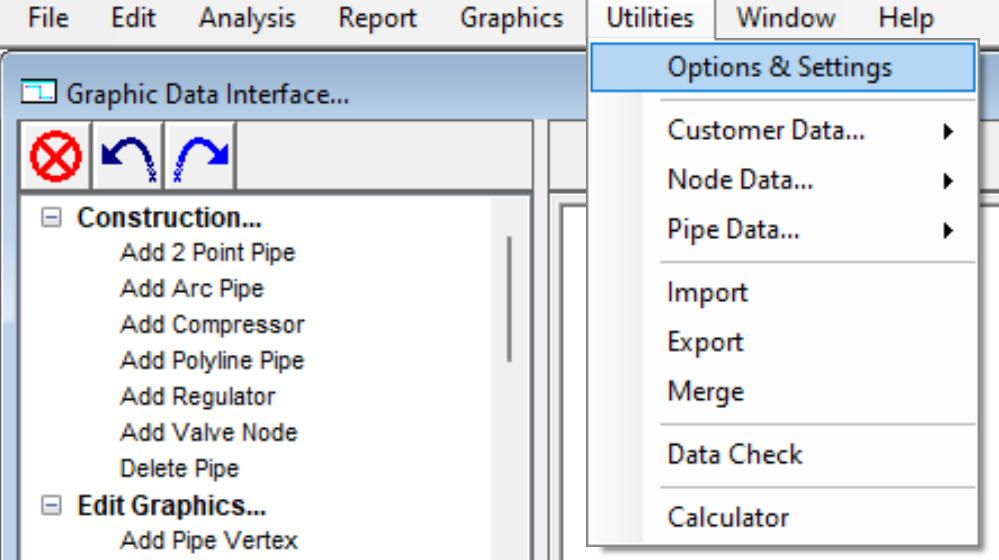
- From the Utilities menu, select Options & Settings.
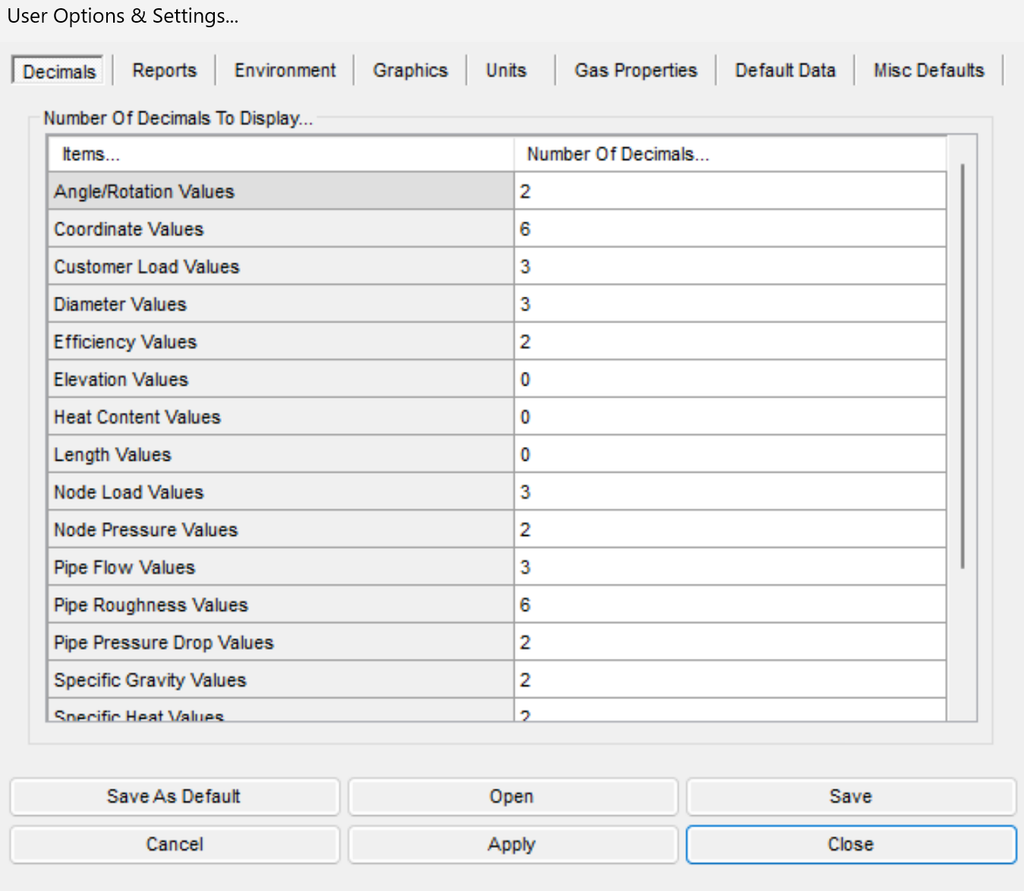
- On the Decimals data tab, set the number of digits displayed to the right of the decimal point for each item, then click Apply.
- On the Units data tab, select the desired unit from each dimensional unit’s list — Coordinate Values, Pressure Values, Length Values, and so on.
- Click Apply to update the current model with the new units, or Close to exit without applying them.
Notes
- GASWorkS starts with standard US default units (feet, inches, psi, Fahrenheit), but supports a wide range of alternatives. The example models included with GASWorkS use US units — to get valid results from them, reset any changed defaults and units back to US values first.
- All pressure units represent gauge pressure unless noted otherwise; absolute pressure units carry an “a” or “(Abs)” suffix. Gas volumes and flow rates are expressed in standard volumetric units, adjusted to the specified base pressure and temperature.
- International users can select from GASWorkS’s full range of dimensional units, and can use the Windows Regional and Language settings to switch between a comma or a dot as the decimal and digit-grouping identifiers. The built-in Property Tables, however, are oriented toward US manufacturers and sizes — they’re meant as a starting point, and can be modified to fit your own needs.
Using The Help System
GASWorkS’s help documentation is accessed through the Help menu and requires an internet connection to retrieve.
- The Help Guide covers examples and how-to tips for specific tasks; the User’s Manual covers individual screens and commands in more detail.
- Help files are stored on the B3PE server, but GASWorkS checks the “docs” folder inside the “app” folder of its install directory first (typically “c:\Program files (x86)\GASWorkS 11\app\docs”). Saving downloaded help files there speeds up future access.
- A document saved locally for offline viewing needs to be opened directly in a PDF viewer — a suitable PDF reader is required either way.
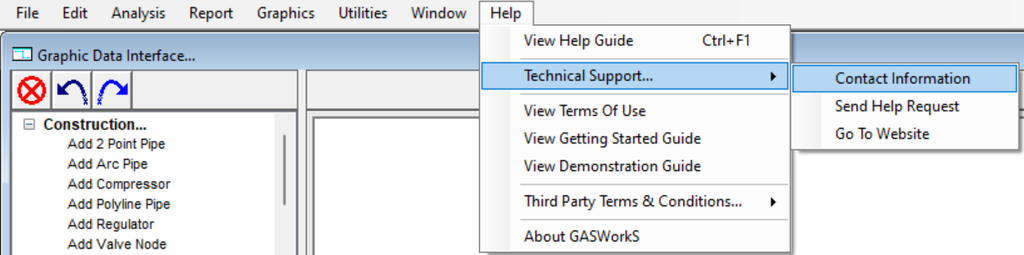
- Besides the documentation itself, the Help menu also provides contact information, a way to send a help request, and a link to the B3PE website. Some of these features require an internet connection.
- B3PE support is available by phone at (719) 578-9391, by email at [email protected], or via www.b3pellc.com, during normal hours of 8:00 A.M. to 5:00 P.M. Mountain Time, Monday through Friday.
Exiting & Uninstalling GASWorkS
Closes GASWorkS, with the option to return or keep your checked-out license, and removes the software entirely if needed.
- To exit and return your checked-out license, open the Exit GASWorkS submenu of the File menu and select And Return License. This requires an internet connection so the User Count can update.
- To exit while keeping the license checked out — useful if you’ll be offline — select Without Returning License instead from the same submenu. The license stays checked out (and the User Count isn’t updated) for up to 30 days, until it’s returned with And Return License.
- To remove GASWorkS entirely, select Uninstall GASWorkS from the Windows GASWorkS menu list, and work through each Uninstall screen as it appears. If asked to remove shared system files, click No.
- When a message reports the uninstall finished (successfully or not), select the appropriate option to clear it.
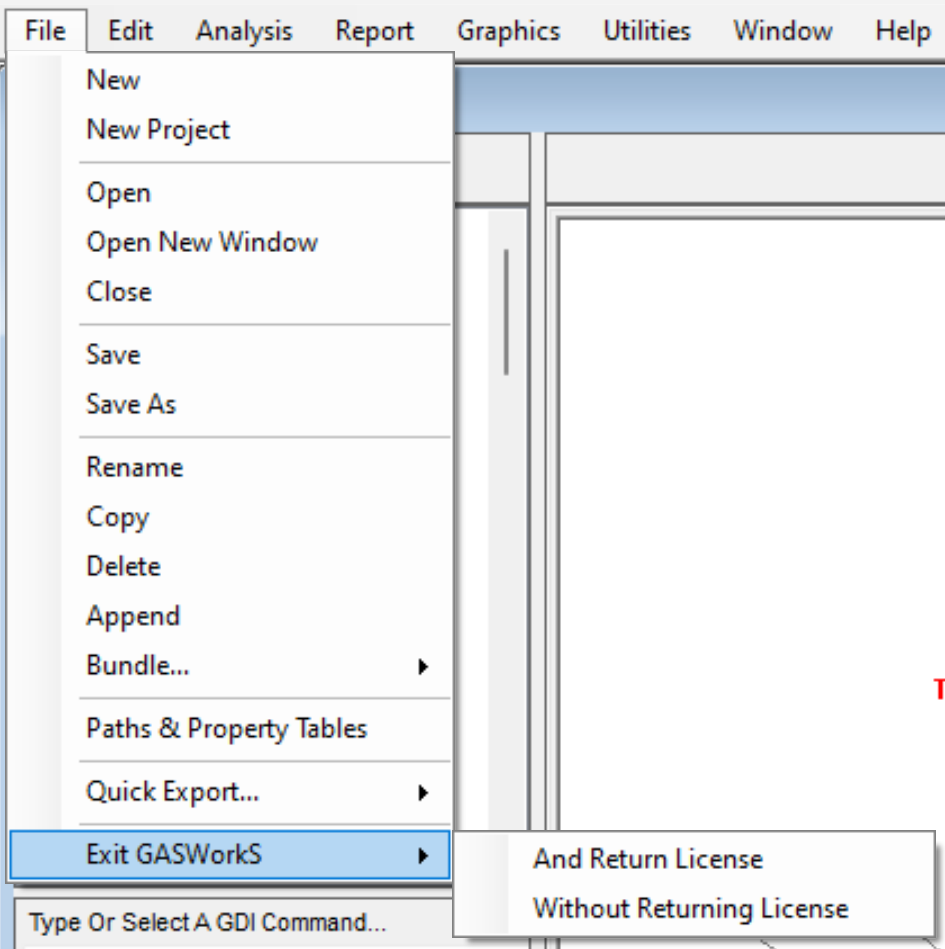
Notes
- On some devices, the Uninstall routine can’t remove files or folders created after the initial installation — for example, files in the initialization directory (ini), the default model file directory (files), or the application directory (app). Use Windows File Explorer to find and delete anything left behind; the initialization folder is typically at C:\Program Files\GASWorkS 11\ini on 32-bit devices or C:\Program Files (x86)\GASWorkS 11\ini on 64-bit devices, with the other folders following a similar pattern.
See Also
- Demonstration: Building & Solving a Model
- Example: GDI Coordinates, Commands & Grips
- Tutorials and Examples — Overview
FAQ
-
Which model file format should I choose when creating a new model?
For GASWorkS 11 we recommend the “.gwz” format, which stores the entire model as a single file. The older “hdr” format from GASWorkS 10.2 and earlier is still supported, but it stores the model as a group of individual files.
-
Do I have to set the default data values before I start building?We general advise to do so, because every new node and pipe is populated from the current default data values, allowing to avoid setting new values for every imported pipe. Additionally, default data values can be saved, allowing for new models to automatically use the same configuration. As an alternative, you can also select ‘Use Last Record As Default’ on the Default Data tab, which populates a new feature from the last similar feature already in the model.
-
What are the different ways to enter a node’s location?You can type an X-Y coordinate pair (for example, 1000,1000), enter a relative distance and angle prefixed with “@” (for example, @500<180, measured clockwise from north), or draw the segment with the mouse. You can also reference an existing node by name using the "N" prefix — typing "N SUPPLY" uses that node's location.
-
What does a negative load value mean?A negative load indicates gas leaving the system — a demand. Positive values, by contrast, represent gas entering the system.
-
My model has negative pressures after I added the new tap. What happened?Negative (below-zero) pressures mean the system has effectively “run out of gas” — the added demand is greater than the network’s capacity. To address this issue, we generally recommend using the color-coding feature (by Pipe Pressure Drop) to find the pipes with the highest drop, and resizing to a larger pipe where possible.
-
Why do I need to solve the model again after making a change?Any change to the model invalidates the previously computed pressures and flows, so you will need to re-solve to get valid results after you change an input. The Solve icon tells you the state of the calculator at a glance: the scale shows balanced (blue) after a successful solution and unbalanced when a change means a new solution is needed.
-
Can I export the report data to a spreadsheet?Yes. You can save the report directly as a Comma Separated Values (.csv) file and open it in a spreadsheet, or copy the report contents to the Windows Clipboard and paste them into another application. You can also use the Set Columns routine to choose which columns display and print, and build query-based selection sets to filter and sort the records.